


Download the Specification Wordprocessing and Production paper.
Macintosh users
Q. I use Pages on a Macintosh – am I able to use NATSPEC?
A. Pages will open and convert the NATSPEC Microsoft Word files
- Pages will not convert the hidden text (guidance and optional) that we have in our files.
- Pages will convert Table of contents and it will be a clickable field.
- You can insert your own Table of contents using Pages (Insert/Table of Contents/Document).
You could continue to use Pages but you will be missing some features that Microsoft Word has.
Q. I'm not using Microsoft Word can I still use NATSPEC?
A. Depending on the wordprocessing application you're using you should be able to open and edit the NATSPEC files. We've found that the most common problem with not using MS Word is that the Guidance text (or hidden text) is not an available function in other applications. If this is the case with the application you are using then you can access the Guidance text via the supplied PDF documents.
Locations
Q. Where are the guidance notes in the NATSPEC Template Word files?
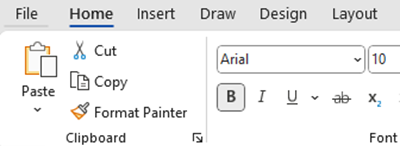
A. In order to read the guidance notes, "Hidden text" must be turned on. Simply use the "On/Off" button in the NATSPEC toolbar, the Paragraph Marker button on the Home Ribbon (¶) or do it manually as follows:
- For Word 03, go to the Tools menu, choose Options (last item), click on the View tab and tick Hidden text (under the Formatting marks heading).
- For Word 07, click on the Officebutton, choose Wordoptions (last item), click on Display and tick Hiddentext.
- For Word 2008 & 2011 (Macintosh), go to the Word menu, choose Preferences, click on the View button and tick Hidden text (under Nonprinting characters heading)
- For Word 10, go to File menu, choose Options (last item), click on Display and tick Hidden text.
- For Word 2013 and 2016, go to File menu, choose Options, click on Display and tick Hidden text.
Q. My Table of Contents has an error message or it is not updated. How can I fix this?
A. Once the document has been merged into a single file it is possible to create or update the Table of Contents (TOC).
For Windows versions, simply right click over the table and choose Updatefield. This will update the TOC to reflect your contents.
For Macintosh versions press Ctrl and click to the left of the Table of contents and choose Update field. This will update the TOC to reflect your contents.
Q. I haven't used the NATSPEC Specification Cover sheet. How do I insert a Table of Contents?
A. Simply place your cursor where you wish the Table of Contents to appear and do the following:
Word 2013: Select the References tab and click the Table of Contents button. Select Custom Table of Contents, choose how many heading levels you wish to show in the table and click OK.
Word 2008 and 2011 (Macintosh): Select the Insert menu, choose Index and Tables, choose Table of Contents tab, choose how many heading levels you wish to show in the Table of contents and click OK.
Word 2010: Select the References tab and click the Table of Contents button. Select Insert Table of Contents, choose how many heading levels you wish to show in the Table of contents and click OK.
Word 2007: Select the References tab and click the Table of Contents button. Select Insert Table of Contents, choose how many heading levels you wish to show in the Table of contents and click OK.
Word 2003: Select the Insert menu, choose Reference, choose Index and Tables, choose Table of Contents tab, choose how many heading levels you wish to show in the Table of contents and click OK.
Master documents
Q. I don't understand Master Documents - is there an easier way?
A. Yes. Microsoft Word 2007, 2010 and 2013 have a feature called Insert/Object/Text from file that will very quickly join a number of Word documents together. The following method will insert the contents of all the selected files into a single document (it’s like you have “cut and pasted” each individual file).
- Open a blank document or open a document based on the NATSPEC template file (NATSPEC.DOTX).
- Click the Insert tab and click on the Object button arrow.
- Select Text from File.
- Navigate to the folder that contains the files you wish to merge.
- Select All (Ctrl A) [Remember to deselect the files that you do not wish to add the merged document].
- Click the Insert button.
- Insert a Page Break between each worksection.
- Save the file.
This method works on Word for Macintosh, except worksections will need to be added individually. This document is not connected in any way to the subdocuments - it is a standalone document.
Q. My Master Document keeps crashing?
A. Check to see how many other programs you have open when trying to expand the Master document. We have had examples of people with 10 or more other programs open and when these were closed, the crashing stopped.
When you "Expand subdocuments", Microsoft Word opens every subdocument in the background and this requires quite a bit of memory. With too many programs open (especially memory hungry programs like Revit) there is not enough memory to go around. It is best to close all other programs and then try expanding the master document.
Q. I am having trouble working with Master Documents. Any tips?
A. The Microsoft Word Master Document function is not designed to work with files saved on Sharepoint or OneDrive. It works by linking to files using a filepath and those files need to be located either on the local drive or windows server drive.
Try to avoid saving the Word documents in too many nested folders. The filepath for the hyperlinks have a limit of 256 characters (including the drive letter), longer than this and Word will not recognise the filename.
Some tips when working with Master documents:
- When expanding the master document make sure you have closed as many other open programs as you can.
- When the master document is expanded you can work with it as you would any other Word document but it is recommended that you do the bulk of your editing in the individual worksections – it’s faster, more than one person can work on the same project and it minimises the chances of corrupting the files should the computer crash. Please note that when the master document is expanded, each subdocument is open in the background.
- When the master document is expanded you can update/generate the Table of contents, make any global changes, edit your Header and Footer, PDF and/or print your document.
Optional text, Guidance text etc
Q. How do I delete all the guidance text from my document?
A. Simply use the 'Delete Hidden Text' button on the NATSPEC Toolbar or do it manually as follows:
Q. How to include/exclude Guidance Text for print?
A. Follow the below instructions to include/exclude Guidance Text for print:
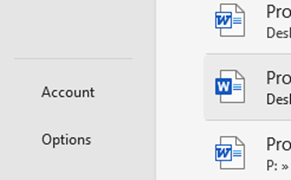
- Click File in the top-left
- Click Options in the bottom left
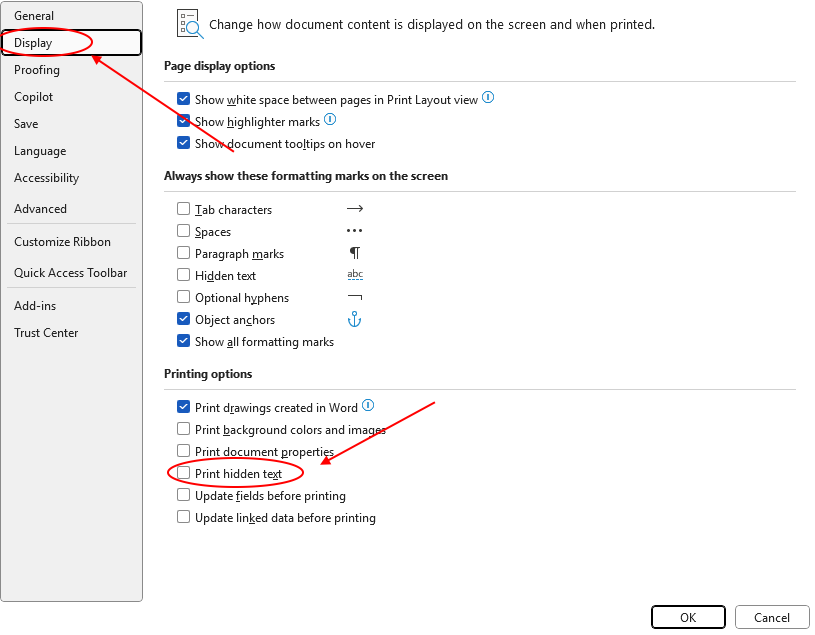
- Select Display
- Check/uncheck Print hidden text
- Click OK
Q. When converting Optional text to worksection text, how do you remove the grey background when the hidden text is converted?
A. Select the text and apply the appropriate style e.g. normal, normal indent, Heading 4, etc. this will reformat the text to the selected style and remove the shading.
Q. My headers and footers aren’t showing through the entire document?
A. You need to Link your headers and footers to each other. There are Header/Footer buttons called Link to Previous and Next. Go into the header or footer of the second section and click Link to Previous, Word will ask if you're sure click Yes. Then click Next and do the same until all sections are linked.
When we try and open the file it states “Word found unreadable content in “file name”. Do you want to recover the contents documents? If you trust the source of this document, click yes.”. When we click yes the document opens however it is not linking to any of the section files.
Looks like the Word security needs to be adjusted in order to read the master document.
- Open Word – just a blank file will do.
- Go to File/Options
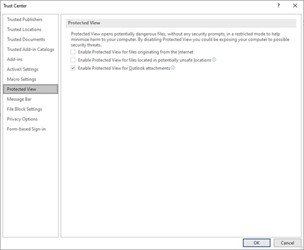
- In Word Options on the left-hand-side column select Trust Center
- Click Trust Center Settings button
- Make sure the first 2 checkboxes are unchecked.
- Click OK and OK again.
This should solve the issue.